
As I am sure I have said before, it is baby season in our life at present, and I decided I was in need of a new challenge. With a friend's baby shower coming up, I decided to attempt making a small quilt for the baby to play on. With my Mum, the master quilter, on hand for advice, I was ready to begin, and I was quite elated at how the quilt turned out. I am a bit of a cheat as no actual hand quilting was involved, so this is a relatively easy little number to put together.
- 1 meter (1.5 yards) fabric for backing of quilt
- 75cm (1 yard) each of two other fabrics for the face of the quilt
- 1 meter (1.5 yards) of batting (we used 'Poly-down', a polyester, machine washable, non-allergenic batting available from quilt shops)
- 4 metres (4.5 yards) of bias binding tape to match your quilt
- cotton to match your fabrics
- Curved safety pins (from fabric shops)
- Masking tape
1. It's a good idea to wash, dry and iron all your fabric before you begin.
2. The quilt face is made up of 9 rectangles, 5 from one fabric and 4 from the other. Cut your pieces using a rotary cutter if you have one.

3. Lay out the pieces in the pattern you would like them,
 and then take the three pieces in each row, place them face to face and pin together. You should end up with three rows of three.


4. Using a 1/4" seam, sew the pieces together, then give a good iron.


edges with a little masking tape to secure.

7. Next we will lie the batting over the fabric and smooth it out. If using the spray, spray again before the next step.


8. Then lie the quilt top face up on top of the batting. The backing and the batting should overhang the edge of the face slightly as we haven't cut them to shape yet.


9. Now pin the three layers together. I used curved safety pins which make the job much easier, and pin all around the edge, along the seams and in the middle of each block.


12. I was also wanting diagonal quilting on the face of the quilt. For this part, run a long line of masking tape from the corner of each square right across to the other corner and through to the other side of the quilt.

Make all the lines in one direction, then sew along the tape edge.

When all the lines are done, remove the tape and repeat for all the squares in the other direction.


When all the lines are done, remove the tape and repeat for all the squares in the other direction.


14. Next, trim up all the sides so you are left with a nice neat, straight edges.


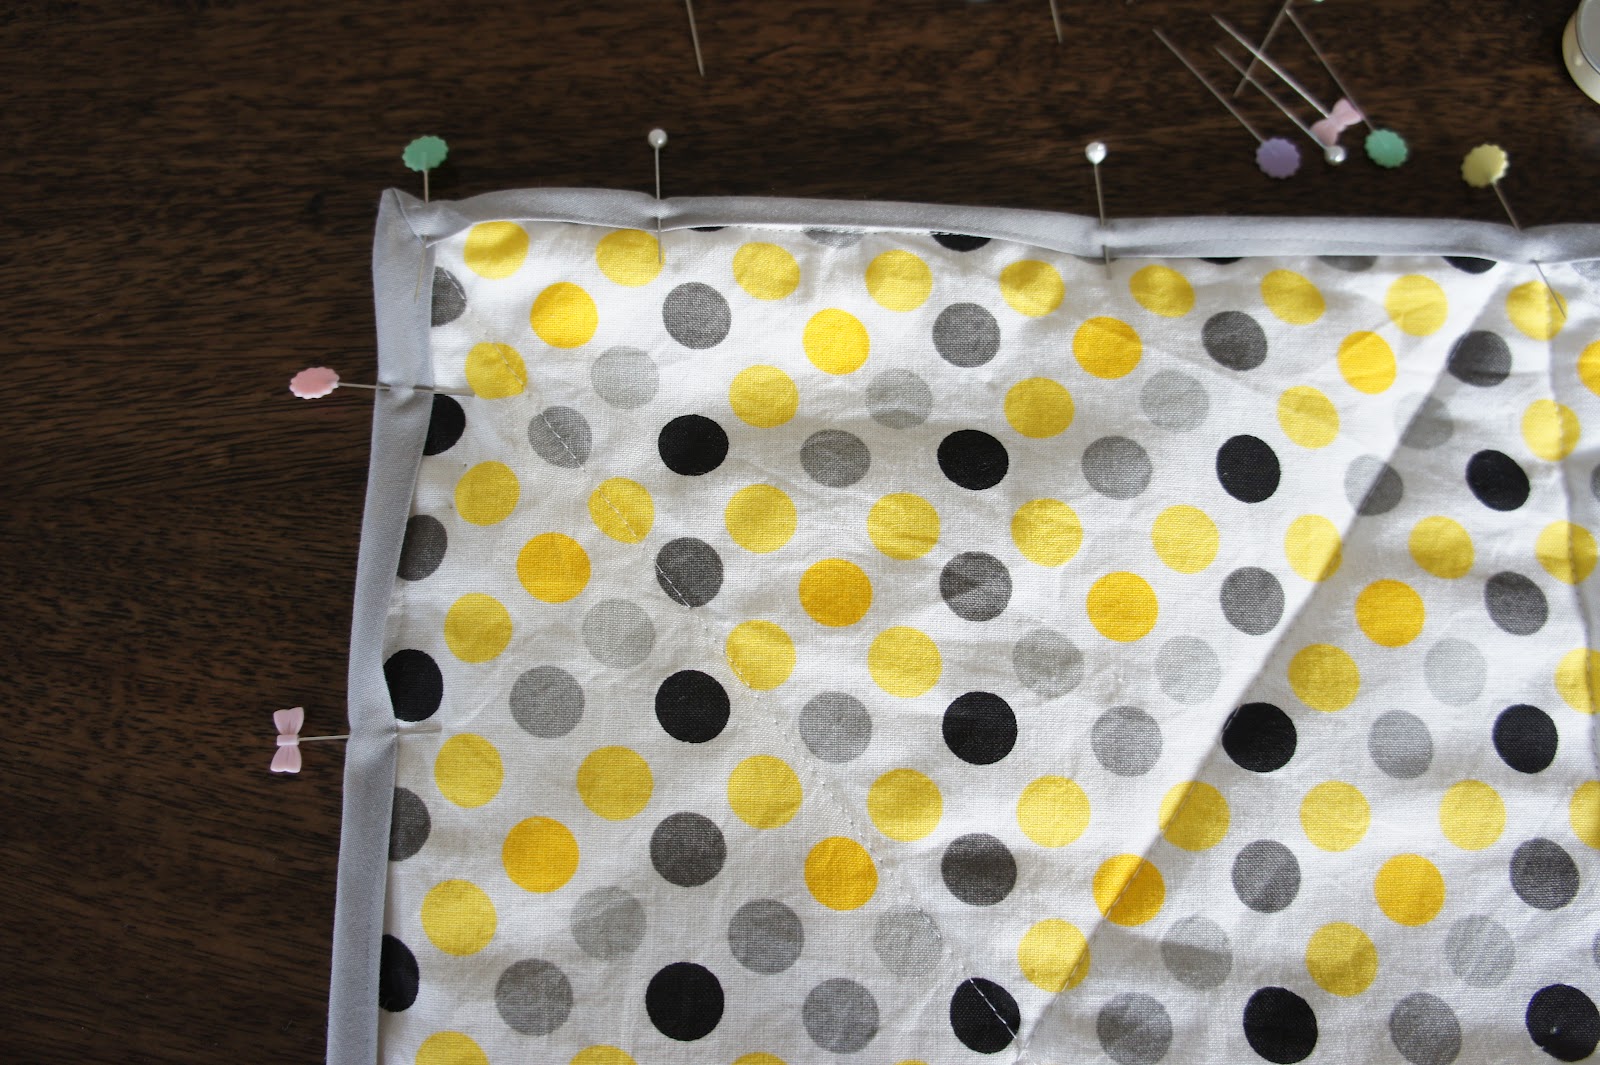
15. Now pin the bottom edge of the binding just under half it's width form the quilt edge (eg. if it is 1" thick, pin it a little less than 1/2" form the edge).

For a nice finish, use mitred corners.


(see 'Sew to Speak' for how to do this).
16. Sew the binding down by sewing along the top fold of the binding, then flip it over the top and pin to the backing.
I then machine sew the binding down from this side too (because I am lazy), and to do this you sew it from the front side, right along the bottom of the binding, and this captures the other side too. For good tips on attaching the bias binding by machine see 'Little Chicken's No Swearing Method'.

This method didn't leave as nice a finish as it would if you hand sew it, which is what I will do in future.

17. You are finished! Now sit back, and enjoy the thrill of having made something lovely, all the while thinking of someone you treasure and the little someone about to bless their lives!


xx