Sunday, 17 February 2013

Sweet (and easy) little girls pocket skirt tutorial


I love these sweet little skirts. They are made to sit above the knee, so are suitable for crawlers, and look gorgeous on their own or over leggings. Plus they are very easy to make, and can be made in about an hour. The measurements given are for a girl about 9 - 12 months. Just make everything larger for a bigger size.

You will need:
  • 1/2 yard of fabric for skirt
  • 2 pieces of fabric for pocket (7" x 7" pieces x2 would be ample)
  • 16" of 1/2 or 3/4" wide elastic for waistband (make sure you measure around bubs waist first, as you may need longer elastic, so it is not too tight)
  • needle and thread
1. To begin, cut 2 rectangles 11" x 16" for your skirt.


2. Place the two rectangles right (printed) sides together. Pin down the shorter sides, and sew down each side using a 1/4" seam, so you are left with a tube, then press the seams flat.


3. Fold the top hem down 1/2" and press flat, then fold over another 1" and pin in place.


4. Sew a seam right along (1/10") the bottom edge of the hem, leaving an 1.5" gap.


5. Fold the bottom hem up 1/2" and press, and then fold over another 1/2" inch, pin and then sew into place as above but do not leave a gap.


6. Using a safety pin to guide, thread the elastic through the opening left in the top hem and all the way around until it comes out the other end of the opening, then sew the ends of elastic together, and sew the opening closed.


7. Cut out two pockets. You can do any shape you like, but you want them roughly 5.5" across and 4.5" down, I like to curve the bottom edge.


8. Pin the pockets together with printed sides in and sew around with a 1/8" seam, leaving a 1.5" gap on one side.


9. Snip off the corners, and clip around the curve at 1cm intervals. Clip up toward the seam, but stop before it so you don't cut the thread.


10. Turn the pocket right way out by pulling it through the opening left in the stitching. Then iron it nice and flat and hand sew the opening closed. I like to use a drawing stitch, or ladder stitch, for closing the gap as you can't see it. Quilt Taffy have a great little tutorial on this method.


11. Make a pleat in the top straight edge of the pocket. I do this by finding the centre, and folding the fabric in 1/2" either side. The back edge of the pleat (where my finger is in the pic below) should be about 1".


12. Pin the pleat in place, then sew along the top edge to secure the pleat.


13. Now pin the pocket in place on the front of the skirt, and sew it in place (again sewing about 1/8 - 1/10" from the edge of the pocket). The stitching will be visible on the outside of the pocket, so choose a matching colour if you do not want it to be too obvious. I like the stitching on the outside, so I tend to stick with white thread.


All done! Now just sit back, and enjoy seeing your cute little number on a gorgeous little someone.

xx

Sunday, 23 December 2012

Have yourself a merry little Christmas

Where oh where has this year gone, and what has been happening to all my time? Last thing I remember it was the start of October and I had a few little sewing projects on the boil, the we hit 'wedding season' again (including a lovely little holiday to New Zealand), not to mention chasing around my now crawling baby. Then all of a sudden it was December, and people were putting up trees, playing carols, and posting Santa photos on Facebook... and I was completely disorganised! 
I offer many apologies for being so neglectful to you, and here is a little catch up on what I have been up to of late.

The sewing has been going in peaks and troughs the last few months, but here's what has been happening:


I am loving these sweet little cuddly elephant toys, and have given them to new babies and as Christmas presents too. The awesome PDF pattern is available from Retro Mama's Etsy store. 

I have patched a few more baby quilts, and working on a bias binding free version, which is much easier, and gives a pretty nice result. Watch out for a tutorial on those babies next year.

And lastly, a wee stocking for our beautiful girl's first Christmas, pattern courtesy of Noodlehead. This was a pretty easy little pattern, though it took me forever as I kept putting off the hand embroidering of the name. This one taught me the valuable lesson of sometimes just follow the pattern, as I did my own thing and messed up the lining so had to do it twice.

The Christmas baking has been a little lower key this year than last, but the customary Strawberry and Rhubarb Jam and Russian tea cakes have of course been coming out of my kitchen hard and fast this month. 

We are hosting my family for our traditional Christmas Eve dinner this year, my first year as host, which will be lovely. We always have a big platter of prawns with Mum's seafood sauce for starters, then the big hot Christmas dinner, and if there is any room left some amazing sweet my sister has concocted. It's been our little tradition for years now, and is so nice because we then all get Christmas morning together too before heading off to our partners families for Christmas day. 
That is what it is all about after all. Being together. Sharing food and happiness with the ones you love most. 
And so, from our family to yours, may your days be merry and bright while you enjoy a safe and happy holiday season.

xx

Tuesday, 13 November 2012

Jamie Oliver inspired Chilli con carne meatballs


Having rediscovered my 'Jamie's 30 minute meals' cookbook this year, I was very intrigued to watch Jamie's new 15 minute meals. The first episode I saw featured chilli con carne meatballs. Unfortunately, I didn't actually get to see his whole recipe, but managed to catch a few of his techniques, and so created a similar dish myself. Here is my recipe for 'Jamie Oliver inspired chilli con carne meatballs' - Jamie's concept, my flavours.

Ingredients:
  • 500gm lean beef mince
  • 1 clove garlic, minced
  • 1/2 teaspoon each cayenne pepper, ground cumin, ground coriander, and paprika
For the sauce
  • 500gm tomato passata 
  • 1 clove garlic, minced
  • small onion, diced
  • small red capsicum, diced
  • 250gm tinned red kidney beans, rinsed and drained
  • 1/2 tsp each cayenne pepper, ground cumin, ground coriander, paprika and chilli flakes
  1. Place the minced beef in a large bowl with the minced garlic and spices and mix with your hands until well combined.
  2. Roll mix into 20 even sized balls
  3. Heat a little olive oil in a frying pan, and add the meatballs.
  4. Cook the meatballs for about 10 minutes, or until well browned all over. Don't forget to turn them regularly.
  5. While they are cooking, heat a little olive oil in a medium sized saucepan, then add the onion and cook for a minute or so until starting to soften.
  6. Add the garlic, chilli flakes and spices, and capsicum and stir for another minute.
  7. Add the passata and stir well to combine. Season with salt and pepper, and add extra spices to suit personal taste, then pop a lid on and simmer until meatballs are cooked. 
  8. When meatballs are ready, add them to the sauce and leave to simmer. 
  9. Using the pan the meatballs were cooked in, throw the drained kidney beans in and cook for a few minutes. They will start to split open a bit, and go a little crispy and delicious from all the meatball flavours still in the pan. After a few minutes, stir them through your sauce and you are done.
  10. Serve with rice or cous cous, fresh coriander, fresh guacamole (I use advocado, diced tomato, a clove of garlic, fresh coriander, a sprinkle of cumin, and a squeeze of lime) and tobasco sauce.
Enjoy xx

Monday, 15 October 2012

A spring in my step: Rosemary pesto lamb rack

There has been a change around here of late. I can't say for certain if it is the turn of the season, with the blossoms of spring all around me and the sun peeking out with it's promise of summer to come, or that I am simply finding a balance in my life, but I am definitely feeling more like myself. And with the return of myself comes the call of the kitchen. This call is made all the louder by the fact that all the new recipes I was trying were coming from "Feeding your baby and toddler". It was time to get my gastronomical groove back on.

We have been very fortunate in the last few months to join a local food co op, and this has given us great access to fantastic organic produce. The beauty of the box, is that we try to buy as locally as possible, and are getting what is in season at the moment.

As tribute to all things spring, I recently cooked a lovely little lamb rack, with a rosemary pesto, served with Jamie Oliver's 'mushy peas' - a smash up of potatoes, broccoli, peas and a hint of mint. Our taste buds were very pleased with the result.


Rosemary Pesto Lamb Rack

1/2 cup chopped parsley
2 tablespoons chopped fresh rosemary
2 tablespoons grated parmesan
1 garlic clove
3 tablespoons olive oil

500gm lamb rack

  • Preheat oven to 220°C
  • Place parsley, rosemary, parmesan cheese, and garlic in food processor, and blitz to a coarse pesto. With the processor still going, gradually add the oil. Season to taste with salt and pepper.
  • Place the lamb on a baking tray, season with salt and pepper, the coat all over the top and sides with the pesto.
  • Roast for 10 minutes, then reduce oven to 200°C and roast for a remaining 10-15 minutes (medium rare) or longer, to your liking.
  • Allow to rest for 5-10 minutes the slice (I reserve the resting juices for pouring over the meat when you serve it).
Recipe via of Epicurious

Jamie Oliver's Mushy Peas as seen on 'Jamie's 30 minute meals'

2 medium potatoes
1/2 a head of broccoli
250gm frozen peas
knob of butter
1-2 dessert spoons mint sauce
  • Peel the potatoes and chop into 2cm chunks, add to a large saucepan with a pinch of salt and cover with boiling water, put a lid on and simmer over medium heat for about 10 minutes.
  • Cut the very end off the broccoli and discard, then slice the rest of the stem and throw it in with the potatoes. Cut the head of the broccoli into florets and set aside.
  • When the potatoes and stems have been on for about 10 minutes, add the broccoli florets and the peas and continue to bubble away for about 5 more minutes, or until everything is soft.
  • When the veggies are ready, drain the water off and return to the pot, allowing them to steam ry a little. 
  • Add a food knob of butter, a drizzle of olive oil, a pinch of salt and pepper, and 1-2 dessert spoons of mint sauce, and then roughly mash about 10 times. It's quite a chunky mash so you should still have some whole peas in there.
All the quantities I have given are for two serves. When plating up, you could cut the rack into little chops if you prefer, I like the chunkier look so just kept the rack whole and sliced it in two. 

Enjoy.

xx


Tuesday, 2 October 2012

Chocolate cake with peppermint buttercream


It was my husband's birthday on the weekend and I, naturally, wanted to make him a cake. Every year around his birthday we have the same conversation. It goes like this:
I ask him "What sort of cake would you like?" 
And every year he says "Chocolate ripple cake."
Then I say "Wouldn't you like something a bit better than chocolate ripple cake?" 
And he says "What is better than chocolate ripple cake?"
So I end up making him chocolate ripple cake (for those who may not know, chocolate ripple cake is essentially a row of chocolate biscuits sandwiched together and covered all over with whipped cream).

This year we were going away with friends, and I was determined to make something other than the stock standard. Aaron loves chocolate and peppermint together, and this cake was a perfect combination of the two. Even better, it is ridiculously easy.

This would work with any chocolate cake recipe you like. I used old faithful Betty Crocker's extra moist chocolate cake (the packet mix... we're not too fancy for that), and simply split the batter between two pans.
For the frosting, I made peppermint buttercream using the recipe I got from Pip and Ebby's fabulous blog. Her version is for cupcakes, and it makes a lot of frosting, so you might want to make a half quantity and see how you go. I used the frosting in between the cakes and also on top and it was delicious but pretty intense. I think it would also be great with whipped cream in the middle, and the frosting on top.
And then, to jazz it up a little, I crushed up a peppermint crisp bar and piled that in the centre of the top. You could use and sort of choc mint bar, I guess, or even just shaved chocolate.
The mint flavouring was only in the frosting, you could do any other version you like. Caramel frosting with crushed up honeycomb on top, or strawberry frosting with fresh berries, or coffee frosting with those little choc coated beans on top... the options are endless.

Anyway, I think he was pretty happy with the result and that is all that matters.

xx


Wednesday, 26 September 2012

Patchwork Baby Quilt Tutorial


As I am sure I have said before, it is baby season in our life at present, and I decided I was in need of a new challenge. With a friend's baby shower coming up, I decided to attempt making a small quilt for the baby to play on. With my Mum, the master quilter, on hand for advice, I was ready to begin, and I was quite elated at how the quilt turned out. I am a bit of a cheat as no actual hand quilting was involved, so this is a relatively easy little number to put together.

To make your own patchwork baby quilt (finished quilt measuring 92cm x 69cm or 36" x 27") you will need:
  • 1 meter (1.5 yards) fabric for backing of quilt
  • 75cm (1 yard) each of two other fabrics for the face of the quilt
  • 1 meter (1.5 yards) of batting (we used 'Poly-down', a polyester, machine washable, non-allergenic batting available from quilt shops)
  • 4 metres (4.5 yards) of bias binding tape to match your quilt
  • cotton to match your fabrics
  • Curved safety pins (from fabric shops)
  • Masking tape

1. It's a good idea to wash, dry and iron all your fabric before you begin.


2. The quilt face is made up of 9 rectangles, 5 from one fabric and 4 from the other. Cut your pieces using a rotary cutter if you have one.

I wanted my finished quilt about 70cm x 90cm, so cut the blocks  32cm (12.5") x 25cm (9.5"), as we will include a 1/4" seam allowance.

3. Lay out the pieces in the pattern you would like them,
and then take the three pieces in each row, place them face to face and pin together. You should end up with three rows of three.

4. Using a 1/4" seam, sew the pieces together, then give a good iron.

5. Now place the rows face to face, pinning them in place, and then sew them together. Now you will have the completed face for the quilt.

6. Lay out the fabric for the backing of the quilt face down on a clean, flat surface and tape down the
edges with a little masking tape to secure.

If you like, you can spray the upward facing surface of the fabric with a quilt basting spray (available from fabric shops) which will leave the surface lightly tacky, and stop the batting moving around when you place it on.
  
7. Next we will lie the batting over the fabric and smooth it out. If using the spray, spray again before the next step.

8. Then lie the quilt top face up on top of the batting. The backing and the batting should overhang the edge of the face slightly as we haven't cut them to shape yet.

9. Now pin the three layers together. I used curved safety pins which make the job much easier, and pin all around the edge, along the seams and in the middle of each block.

10. Now we will sew along the seams of the quilt face to secure it in place. It is best to use a walking foot on your machine for this, as it helps feed the fabric through and prevents it bunching up.

11. Sew right along the seam lines of both the horizontal and vertical seams.

12. I was also wanting diagonal quilting on the face of the quilt. For this part, run a long line of masking tape from the corner of each square right across to the other corner and through to the other side of the quilt.

Make all the lines in one direction, then sew along the tape edge.

When all the lines are done, remove the tape and repeat for all the squares in the other direction.

13. Now run a seam an 1/8" in from the entire border of the quilt, then remove all the pins (if you haven't already done so). Don't worry about this seam, it will be hidden under the binding.

14. Next, trim up all the sides so you are left with a nice neat, straight edges.

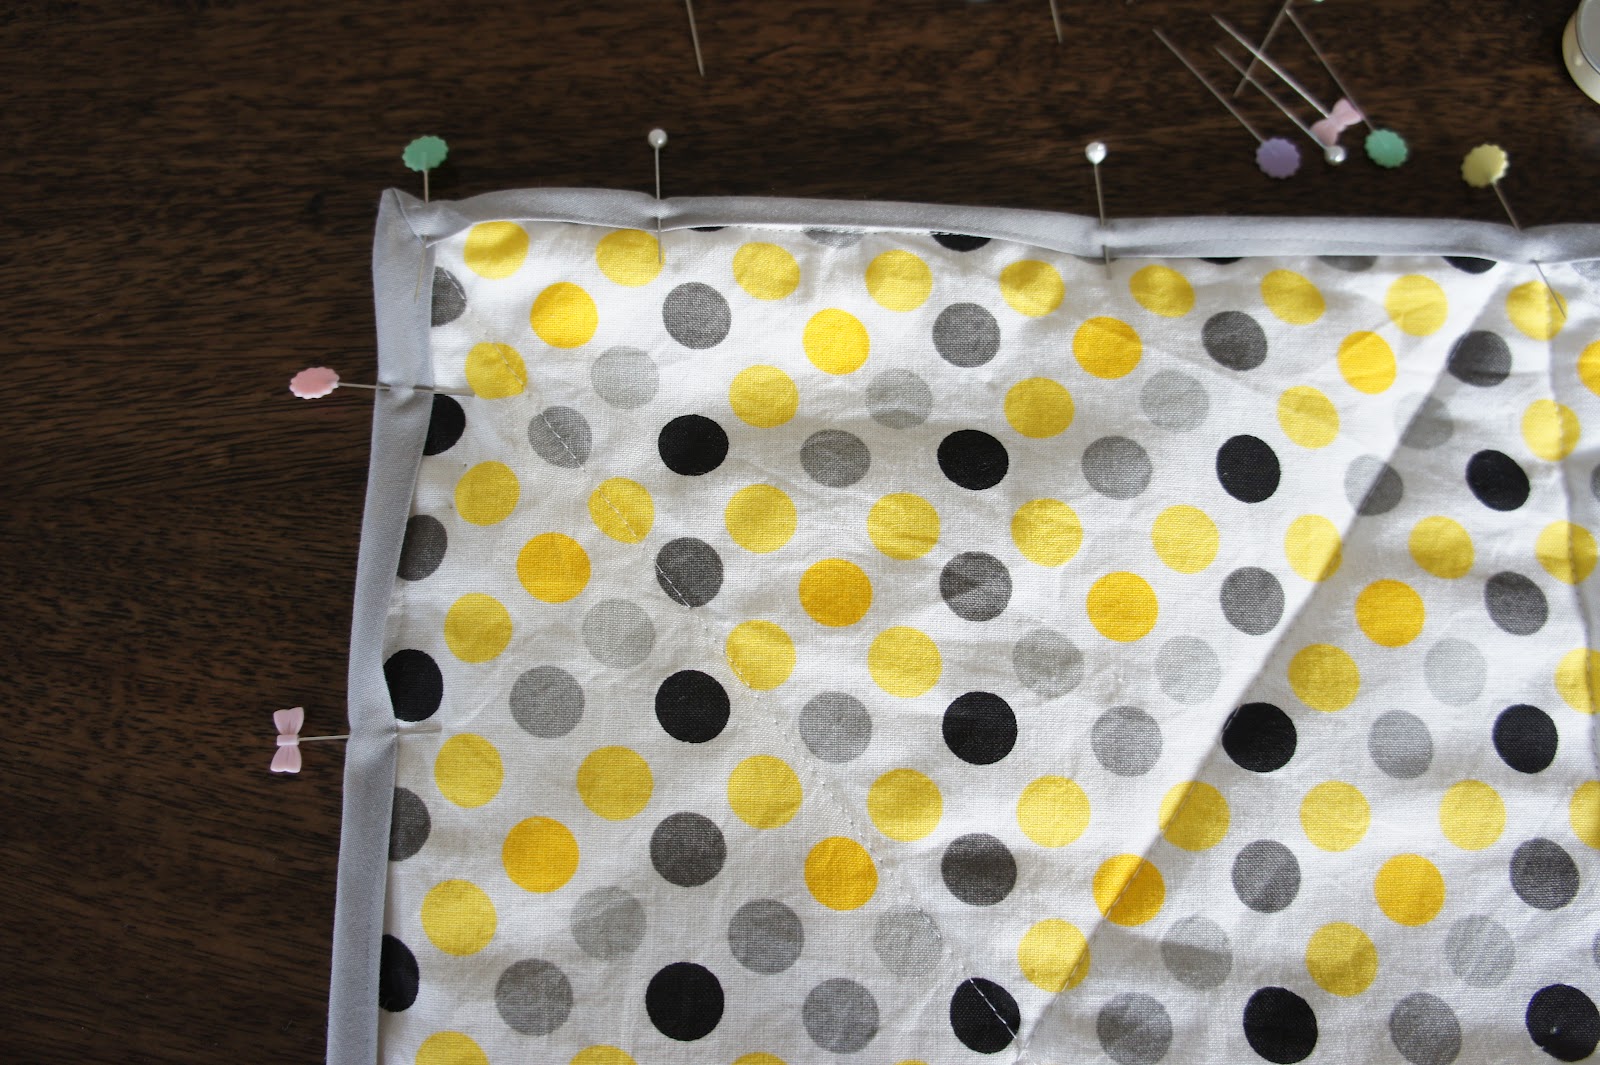
15. Now pin the bottom edge of the binding just under half it's width form the quilt edge (eg. if it is 1" thick, pin it a little less than 1/2" form the edge). 

For a nice finish, use mitred corners. 

(see 'Sew to Speak' for how to do this). 

16. Sew the binding down by sewing along the top fold of the binding, then flip it over the top and pin to the backing.

I then machine sew the binding down from this side too (because I am lazy), and to do this you sew it from the front side, right along the bottom of the binding, and this captures the other side too. For good tips on attaching the bias binding by machine see 'Little Chicken's No Swearing Method'.

This method didn't leave as nice a finish as it would if you hand sew it, which is what I will do in future. 

17. You are finished! Now sit back, and enjoy the thrill of having made something lovely, all the while thinking of someone you treasure and the little someone about to bless their lives!

xx